
Sitemap is a special XML document that tracks all your separate web pages on your website with their content so it can be easily accessible to search engines. Simply, it’s a map of all your articles and important information represented in an easy way that search engines can use.
Search engines like Google, Bing, Baidu and others come and crawl your website according to your sitemap, this means they take all the info from your website and store it in their memory. So when someone searches for a given topic the search engine analyzes the data that is stored in its servers via sitemaps and chooses which web results to show.
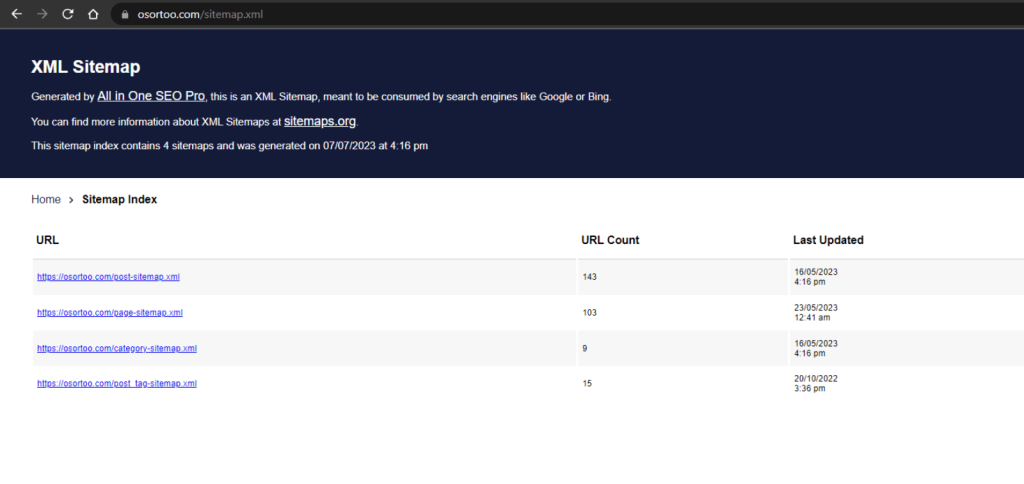
To see a sitemap of a particular website just enter the website URL and add /sitemap_index.xml. For example, take a look below.

If you enter the first link post-sitemap you will see all the articles on the website with the information about how many images every article contains and the date when it was published.

This information gives an overview of your content to search engines. They also provide backup for bad linking, so if some link doesn’t work they can automatically redirect it to the right link.
Search engines like Google, Bing and others use this for crawling your website and giving it a rating on how relevant it is for a given topic. Big part of the rating is how often your site is updated with new articles and information.
There are several ways to create sitemaps, for this example we will use the two most popular WordPress plugins Yoast SEO and All-In-One SEO (AIOSEO). Follow our steps.
Create a Sitemap with Yoast SEO
Step 1 – Find Yoast SEO in the Right Menu
Yoast SEO is an extremely useful SEO tool which has a free and a paid version. Sitemap creation is free so you won’t need to pay anything extra. Go to your WordPress Plug-Ins and install Yoast SEO.

Once that is done you can find Yoast SEO in your WordPress creator in the right menu on the SEO tab. When you come here go to the Features tab.
Step 2 – Create Your Sitemap
Now scroll a bit down and find XML sitemaps, and click on the ? question mark next to the label. You will get an explanation with a link that says “See the XML sitemap”. Click on this link and the sitemap of your link will be generated.
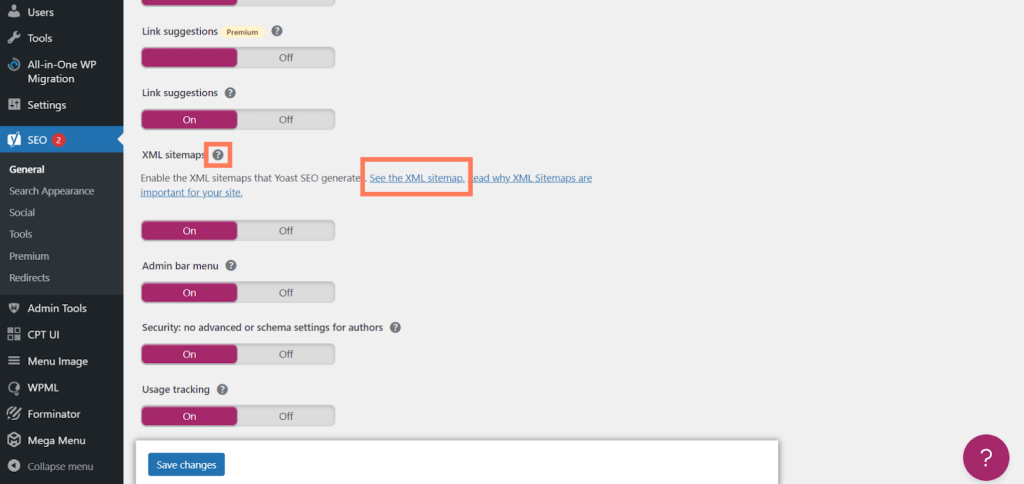
For us that sitemap will be the same sitemap we opened above.

So it’s this sitemap https://yourwebsite.com/sitemap_index.xml. Copy this link you will need it later.
Yay we made a sitemap! So now let’s submit it to Google so they would know how your website looks and will be able to crawl it, so more people can find out about you.
Create a Sitemap with Yoast SEO with All-In-One SEO (AIOSEO)
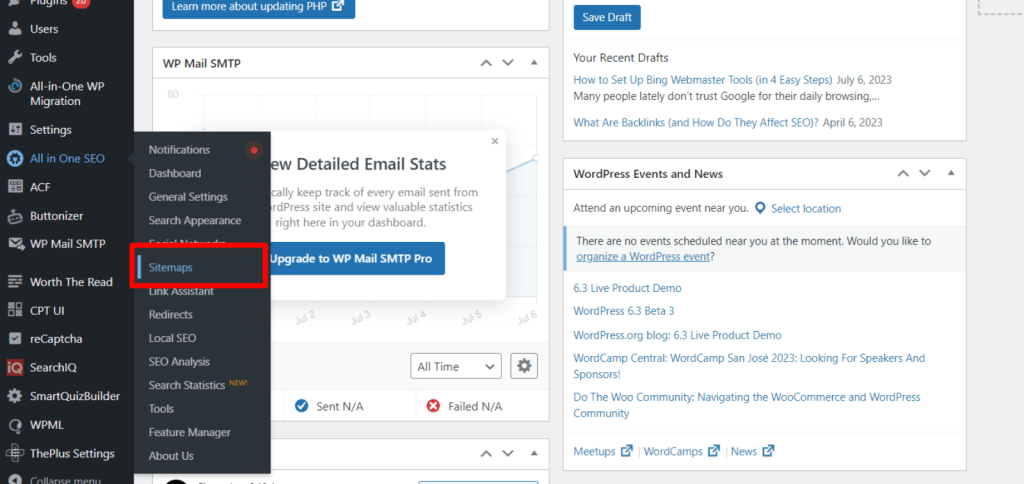
Step 1 – Find AIOSEO in the Right Menu
All-In-One SEO or AIOSEO is the popular alternative to Yoast. It’s great for SEO and it has a very minimal and intuitive design so you will be able to use it very easily.
Find the All in One SEO on the right menu and click on Sitemaps.
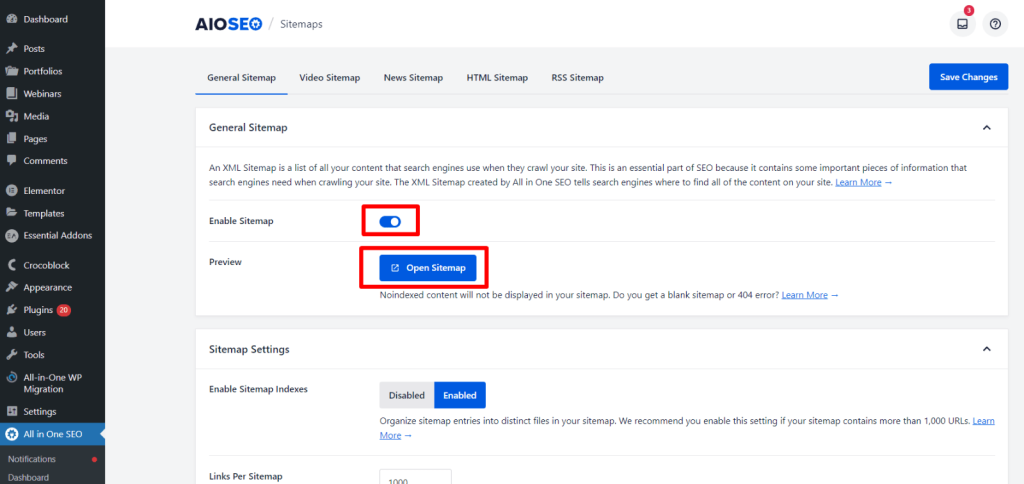
Step 2 – Enable Your Sitemap and Open it
Turn on the Enable Sitemap option and click on the Preview to view your map.
Below you have few options, but if you have a normal website (meaning it’s not a platform or directory) you don’t have to change any of the options and can just stick to the default.
Your sitemap will be open in another window and it will look exactly as Yoast sitemap would.
So you can submit your sitemap in Google Search Console so Google would index all your pages and you will maximize your SEO exposure.
Submit Your Sitemap to Google Search Console
To submit your sitemap to Google you have to install Google Search Console, and log in there.
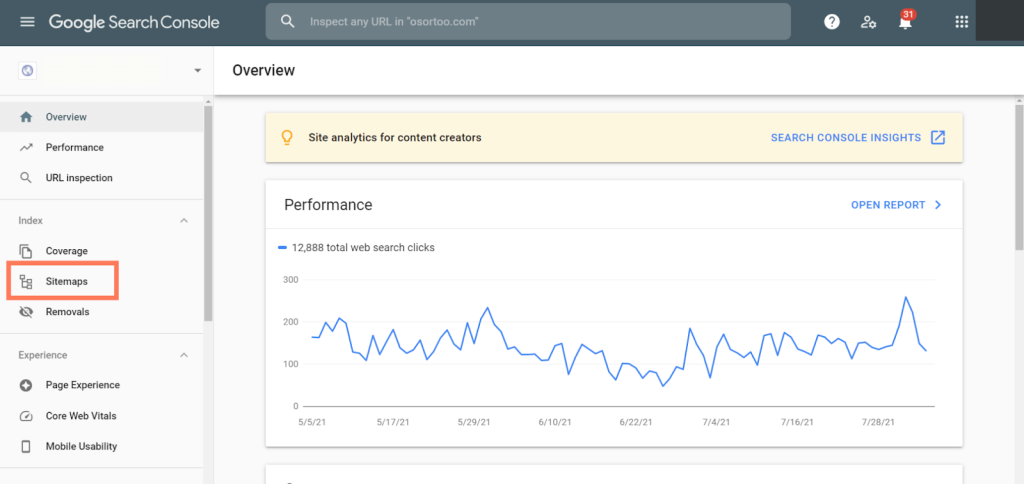
When you log in go to the Sitemaps on the right menu. Here paste the sitemap url that you copied before. Our was https://yourwebsite.com/sitemap_index.xml and click Submit.
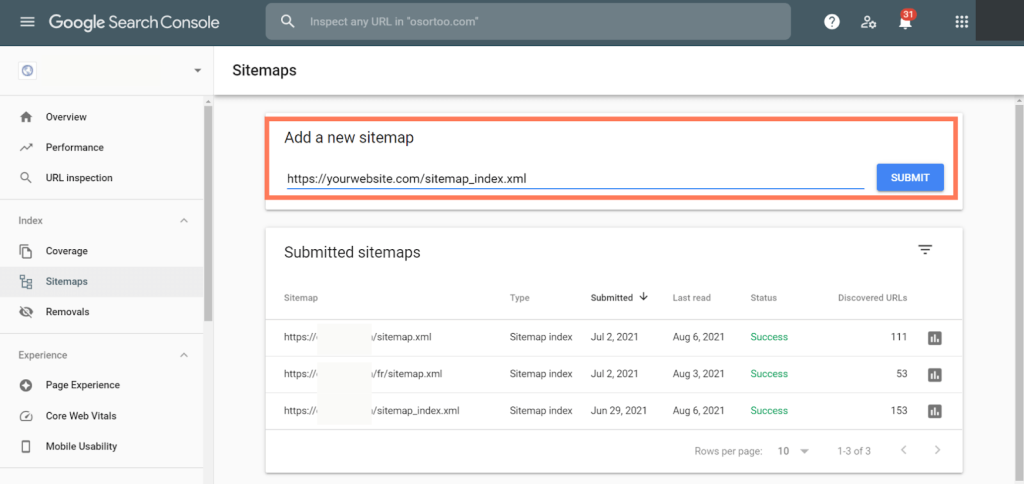
In a few seconds you will get a Status message on the right and it will be Success or Error. If it says Success then congratulations you have submitted your sitemap and you have finished your job, if it says error you have made some mistake and you need to try doing it again.
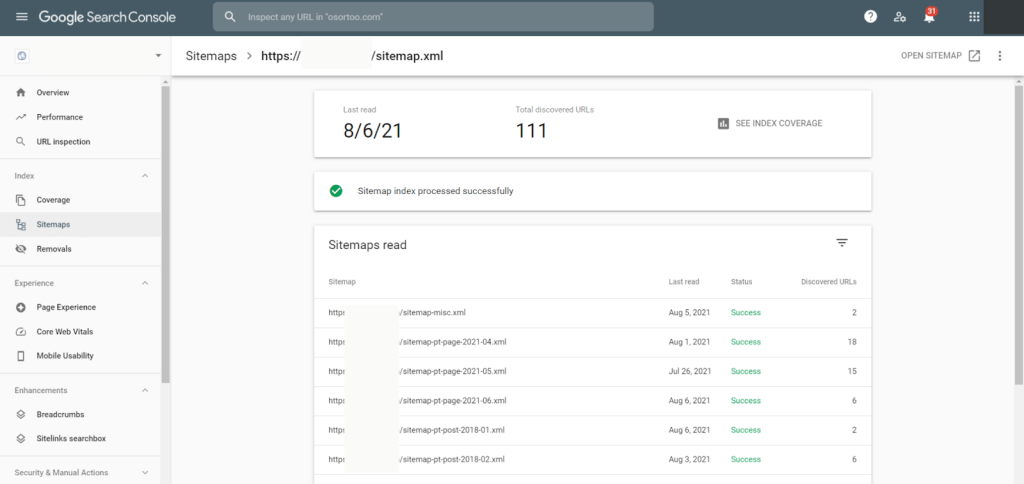
Successfully submitted sitemap looks like this, you can open all those links and see details. Also you get status on all your crawled pages so if you see an error somewhere you know you should go and fix it otherwise it will affect your google positioning and the speed of your website loading.
Conclusion
Sitemaps are an integral part of setting up your website and SEO. You should be cautious about always keeping an eye and updating your sitemap every few weeks so Google can have all your website crawled. If you post more frequently Google’s algorithm will notice and will crawl your website more frequently, by that also it will likely position your website better (if you have quality content).
If you need any help setting up your sitemap or you want some advice on how to improve your SEO don’t hesitate to contact us. We run the best marketing agency in Montreal.


