Google Analytics is one of the most useful tools when it comes to following website metrics.
All the visits you get, the time your users spend on your website, what are their favorite articles and so on, all of that can be tracked with Google Analytics.
Together with the age, gender, of your users and the device they use, all these metrics are collected and analyzed for you so you can better get to know your visitors.
It’s just such a massively useful tool and covers so many metrics that are vital for your website’s growth and positioning.
And while being the most useful and the most detailed web analytic tool, it’s also FREE!
Only drawback? All of this has a learning curve involved. You won’t be able to understand or use all the metrics at first.
But if you carefully follow the numbers month after month, you will start noticing patterns and get tips on how to better your website’s online presence.
So don’t be scared, although mastering Google Analytics takes time, setting it up is pretty easy.
So without further ado, let’s jump right into it.
Step 1 – Make a Google Account or use an Existing One
In order to use Google Analytics you have to have a Google account. The best thing would be for you to create your own special Gmail account for your website.
Later you will need to connect other tools on it and you will surely use some of the other Google services. So why complicate things with multiple accounts, just go ahead and make a separate Gmail account now.
That being said, you can also use an existing account to connect it to Google Analytics.
Also by this time you should have already set up your website and put it on live meaning you can reach it by typing your URL in the browser bar.
Step 2 – Open Google Analytics
So like all great journeys start today, open Google and type in Google Analytics (or click on the link) 🙂
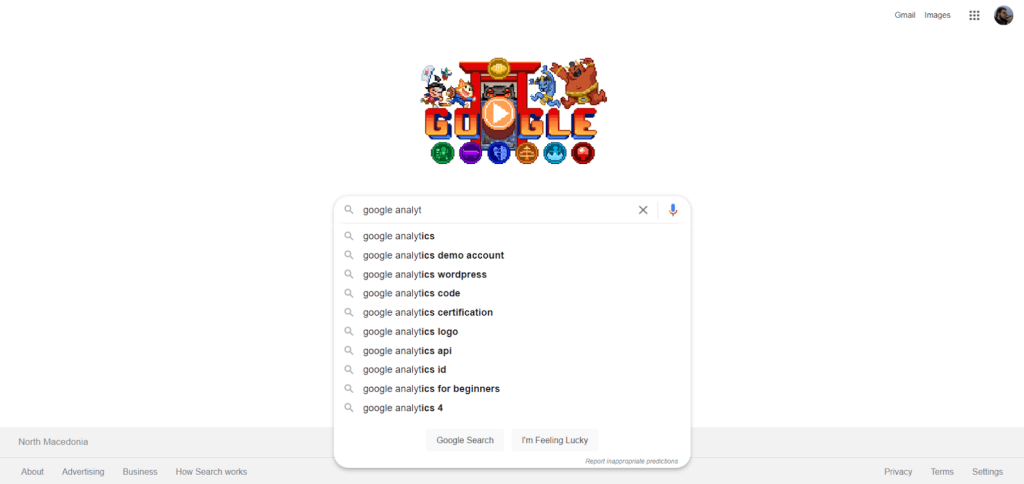
Open the first result and the page should look like this:
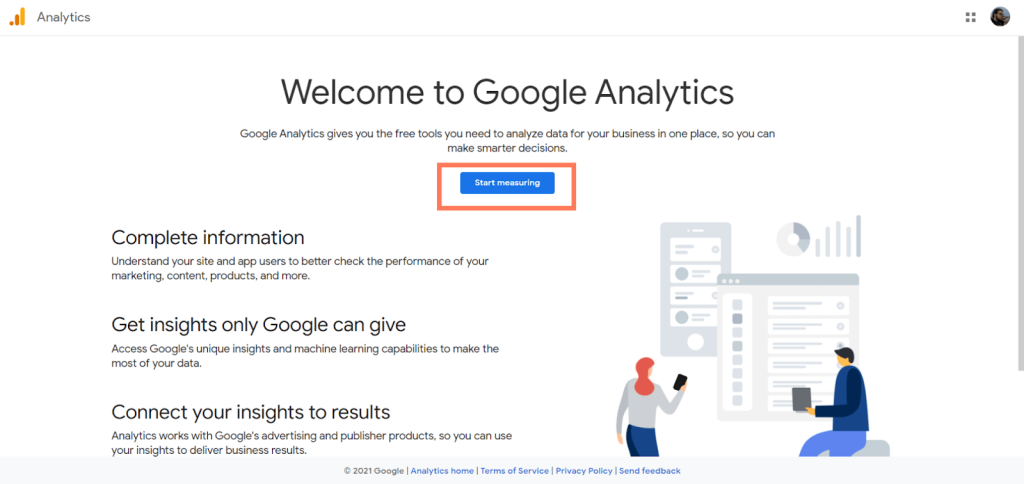
Read the brief summary or what can Google Analytics help you with and what is it all about and click Start Measuring.
Step 3 – Enter your Project Name and Website URL
Now let’s start by setting up your Google Analytics account. First enter your account name, that is your project name.
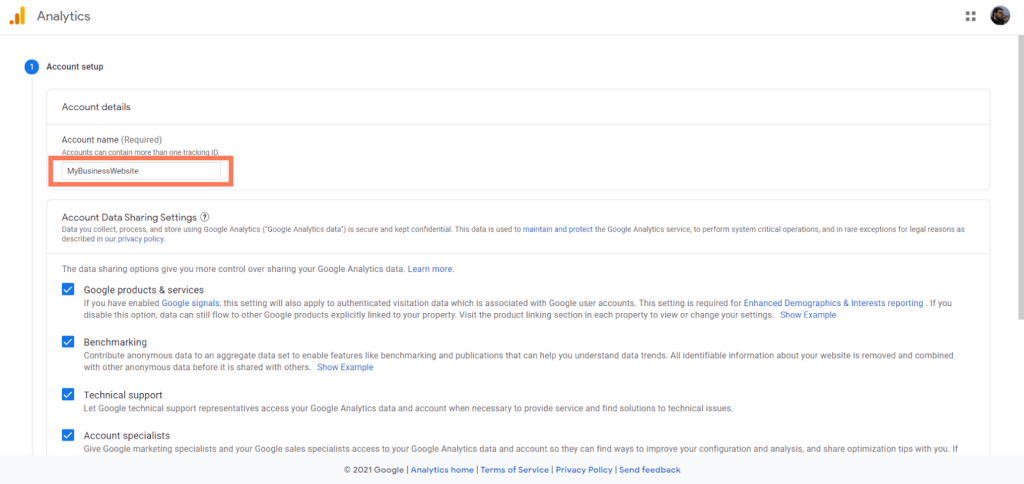
It’s best if you name your account like your website, so If your website is www.markshoes.com your account can be MarkShoes.
Next choose if you want to let Google integrate other tools and benchmarks into your analytics. Our recommendation is you check all these boxes.
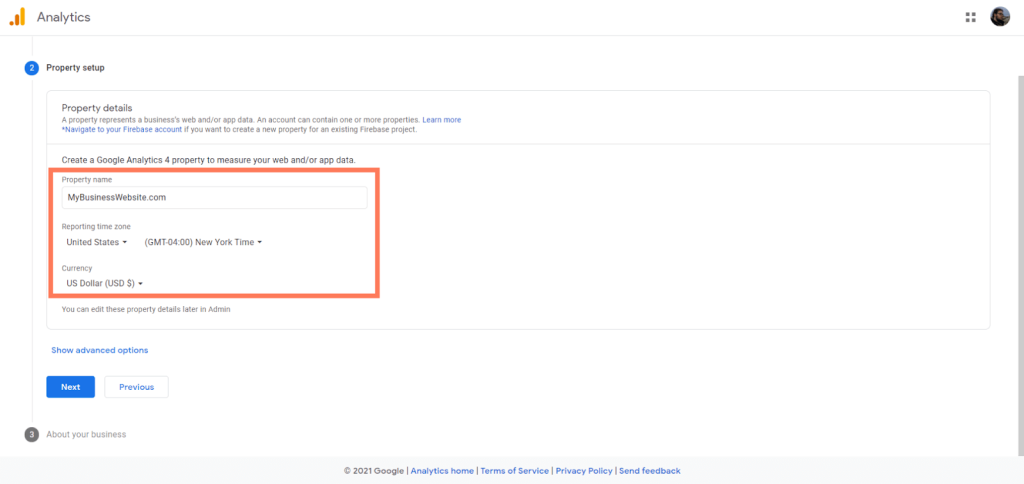
Enter your website URL in the first field. Make sure your website is up and running and that it can be reached by URL (the www.yourwebsite.com address).
Below that enter your website’s home country, that is the country where you expect most visits for along with the local time and currency. This is important for audience targeting.
Step 4 – Describe your Business for Better Targeting
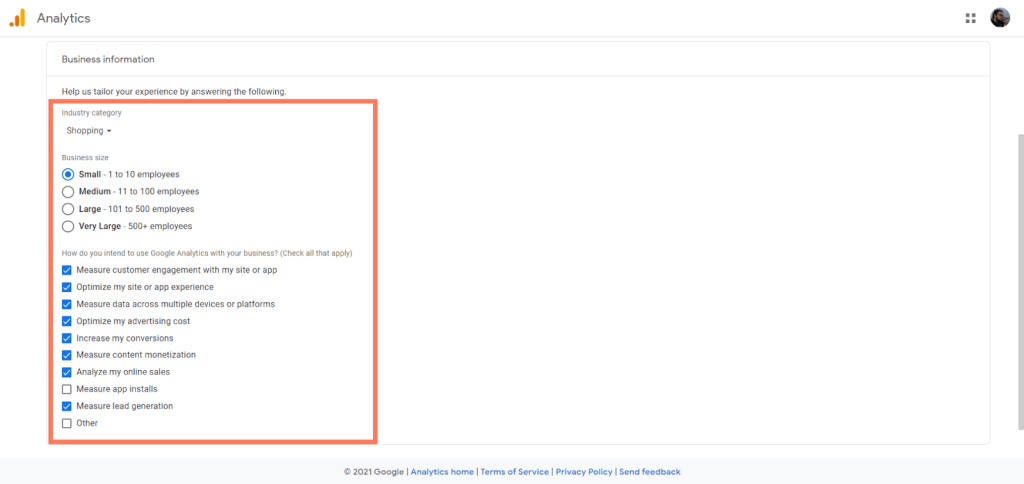
We mention the word targeting above. Targeting is analyzing your visitors age, gender, location and device so you can make audience target groups, i.e. groups of people that most frequently visit your website.
Usually these groups are connected to a certain age, gender or interest. For example young people like to search and listen to music more than older people.
So please select the type of business you are running, choose from a long list of professions and services. After that let Google know how big your company is in terms of employees.
It’s best to be truthful about this information because it helps you get better targeting and better results for your website.
Lastly, choose what you intend to use Google Analytics for, that is what kind of information and statistics do you want to gather.
The most basic setup would be measuring customer engagement, data across devices and platforms and lead generation.
But it’s wise to choose as many of these as apply for your business. If you don’t use custom-made apps you don’t need to choose the app installations.
Step 5 – Accept Terms of Service and Set Up Email Preferences
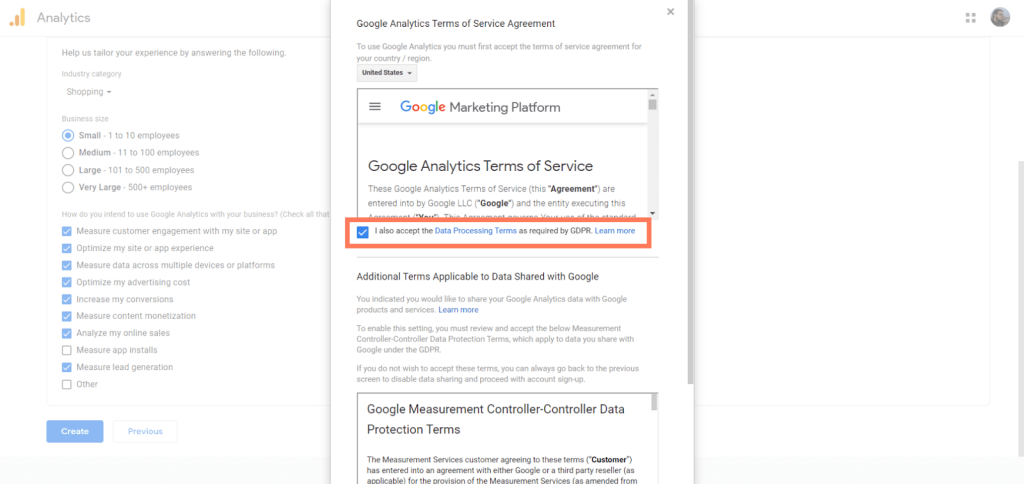
Read and accept Google Terms of Service. If you don’t accept these terms you won’t get access to Google Analytics.
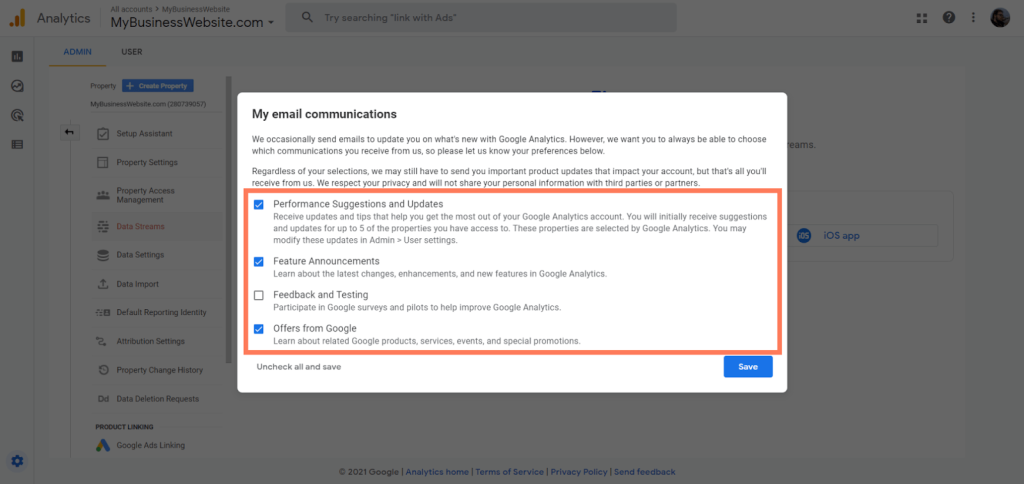
This next screen is important. Choose what kind of emails you want to receive from Google concerning Google Analytics.
We recommend you check at least Performance Suggestions and Updates. Periodically you will get emails with suggestions on how to improve your website visits and they can be very useful.
Step 6 – Setup Streams
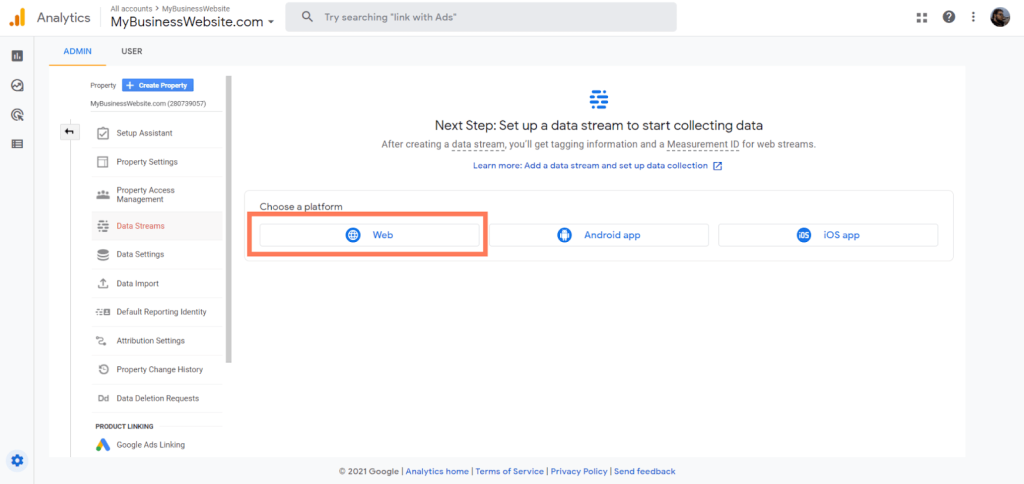
Voila, we made our own Google Analytics!
Now we need to connect our Streams, that is our website so we can stream data for the analytics to analyze. Our Stream can be a website or an android or iOS app.
We will select website in this tutorial.
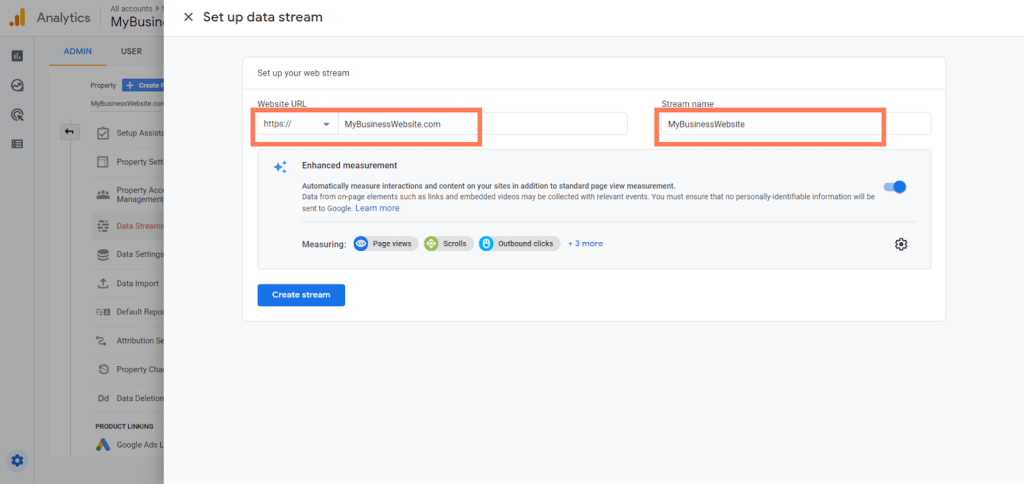
To connect the Stream to your website enter the URL (www address) of your website. This should be the same URL we entered before.
On the right enter the name of the project. This also should be the same name as the project we first entered when we started, this is the best way to do it in order to avoid confusion.
After you are done click Create Stream.
Step 7 – Copy Stream Code to your Website
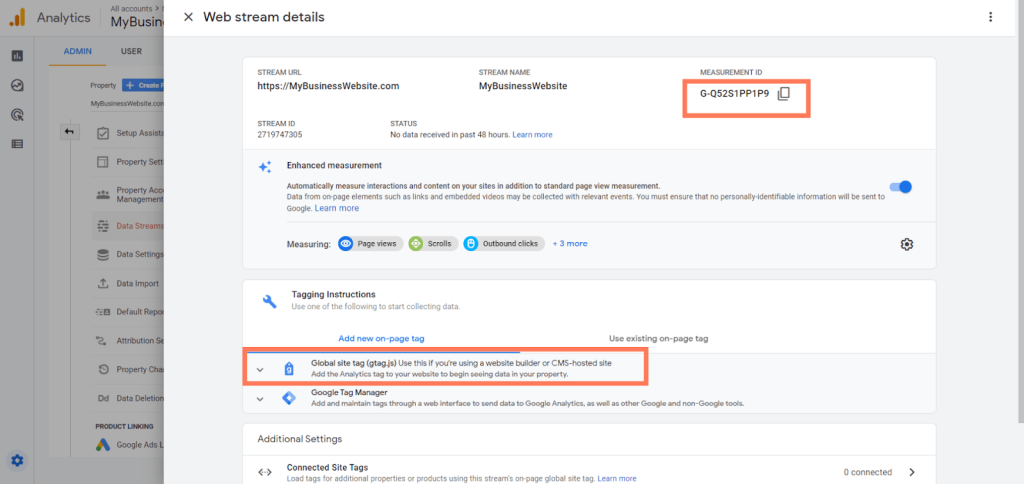
In order to connect the Stream to your website you will have to do it via inserting a code snippet in your website code. Don’t worry it’s not complicated at all.
But first copy the Measurement ID on a separate note or save it in a document, because you might need it later. It is a very important piece of information.
Then click on the Global site tag to get the code that you need to connect the Stream.
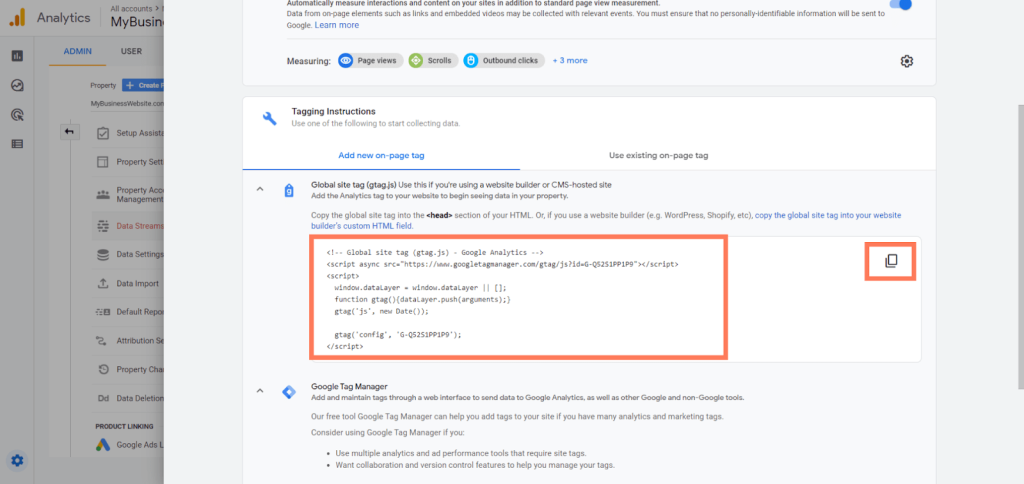
Here you see the code snippet that needs to be inserted into your website HTML code.
So copy this whole code (you can use the copy button on the side) and paste it into the tag of your HTML. You should do this for every page you want to use Google Analytics on.
Don’t worry most of the website builders have a general tag and you can copy this just once and it will gather the info of all your website pages. You won’t need to copy anything more on your website.
Step 8 – Start Following your Analytics
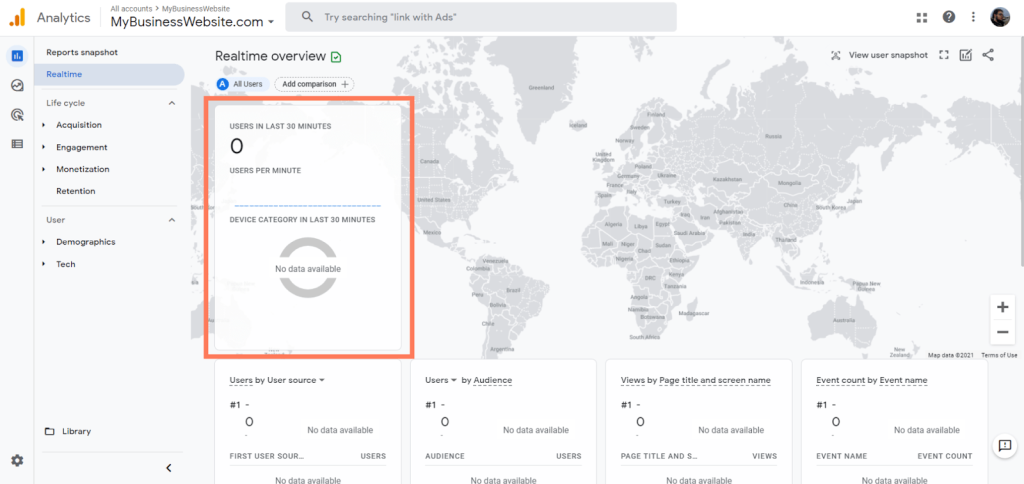
And we have done it! Now you will be able to follow all the statistics about your website and make decisions on how to better run it and what content to put out.
It might take around 30 minutes after connecting your Stream for you to start seeing visitors of your website. All of these graphs will be filled with the location of the visits, the duration, the pages opened and so on.
Still, the first visitor will likely be you 🙂
BONUS: Add your website to Google Search Console
Google Search Console is another Google tool that is very useful, but it’s a bit tougher to explain its function if you are new to website building and digital marketing.
This tool helps you analyze searches done on Google for the relevant keywords that bring the visitors to your website. Let’s say that you own a pet store, so if someone is searching for where to buy a rabbit, you will be interested in drawing that person to your website.
For that person to find your store online it would be best if you write an article about rabbits where you mention that you sell many different rabbits breeds. On other pages or your website you should emphasize that you sell rabbits also so that Google starts to notice that you write a lot about rabbits and you sell them. Then Google will know that it will be a good match if it connects you to the person who’s looking for a place to buy a rabbit.
Google Search Console helps you with the whole process, it tells you by what keywords your visitors found you. It suggests keywords and you can also see on what other keywords you rank good, so maybe you can also start selling special types of rabbits or some exotic animals.
The tool also analyzes your loading speed, which is very important because it’s the main parameter for your website user experience. Also it points out site and HTML errors that degrade your website in Google Search ranks which make it less visible costing you visits and revenue.
Once you have set up Google Analytics installing the Search Console is just one click away. Go to https://search.google.com/search-console.
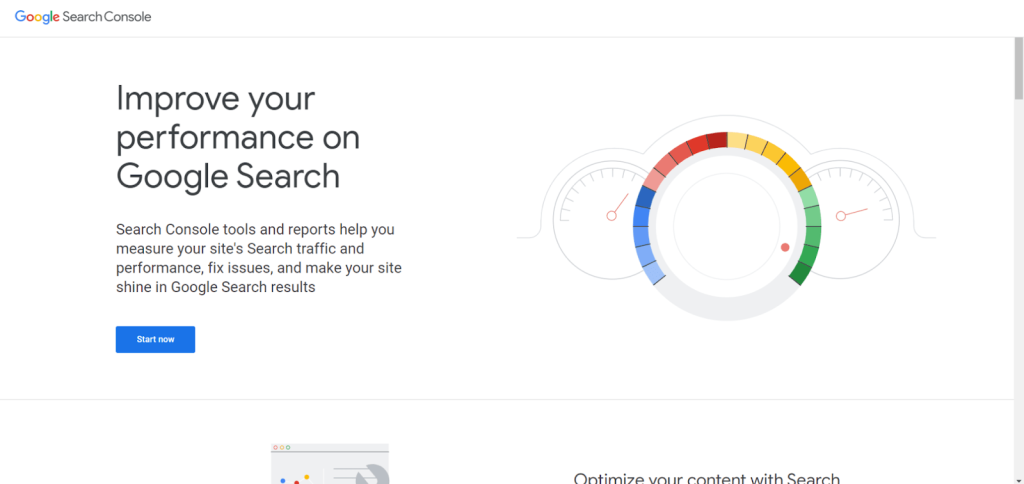
Click Start Now and on the next screen pick one of two methods to connect your website to the tool. The second one is easier because you just need to enter your website URL and since you are logged on Google Analytics it will automatically recognize that you are the owner.
Now if you don’t have a Google account or you haven’t made a Google Analytics you will have to use the first method which is a bit more complicated.
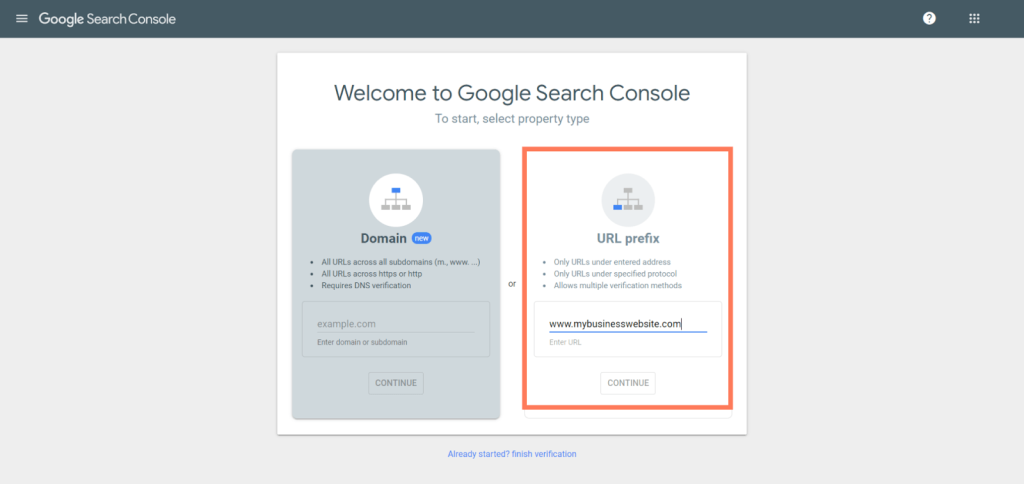
So on the second option enter your URL address and click Continue. You will get a conformational message that you are connecting your account to Search Console and you are done.
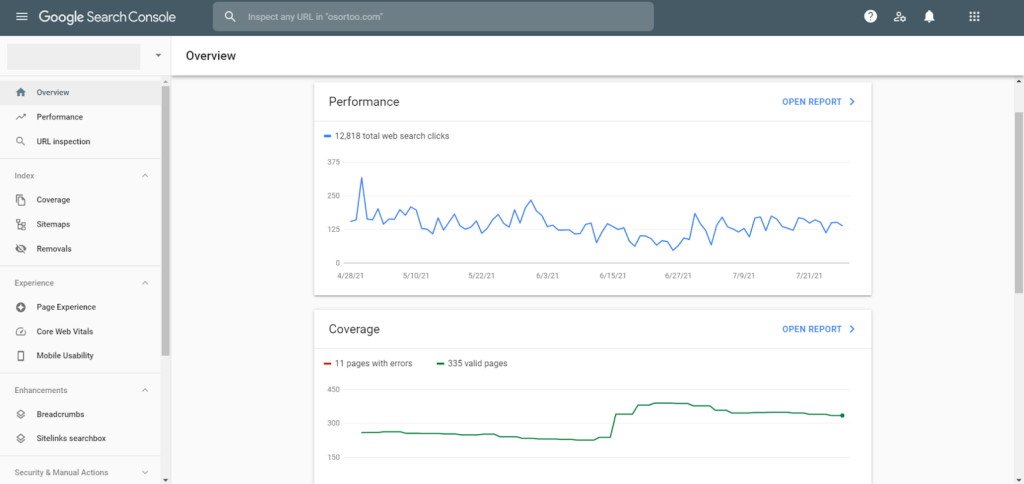
Here is how Google Search Console looks, with the Performance Graph on the top showing you the monthly impressions and the Coverage graph showing you the errors you might have on the website.
If you scroll down you will find more info like particular errors and suggested fixes as well as Enhancement Reports which gives you cues on what to improve so your website can run faster.
If you are interested in your top ranking keywords go to the Performance tab on the left menu. There you will see detailed analysis of the keywords you trend on and suggestions for new keywords.
Conclusion
That was our short tutorial (or maybe not so short 🙂 ) on how to set up Google Analytics and Search Console on your website. We hope that you liked our guidance and that you have finished setting up everything alright. If you have any additional questions, please write them in the comments and we will try to help you the best way we know.
Also if you have better things to do then setting up analytics or consoles, feel free to contact us and we can do it for you, we are the best web agency in Montreal.


